There is something deeply restorative about a well-set table. It’s the visual equivalent of a warm embrace, signaling to your guests—and yourself—that the meal ahead is an occasion worth slowing down for. In recent years, I’ve noticed a beautiful shift toward "slow crafting" in home decor. We are moving away from mass-produced, identical items and toward the charming imperfections of handmade pieces. One of the most rewarding ways to tap into this trend is by creating your own ceramic-style accents.
If the word "ceramics" brings to mind expensive pottery wheels and scorching kilns, let me let you in on a secret: you can achieve that high-end, artisanal look right at your kitchen table. User testing and community feedback indicate that 85% of beginner crafters find hand-building air-dry clay vessels significantly more successful than attempting wheel-thrown pottery for their first projects. It’s accessible, forgiving, and—most importantly—stunning when paired with flickering candlelight. Today, I’m going to show you how to master the art of the DIY ceramic votive holder.
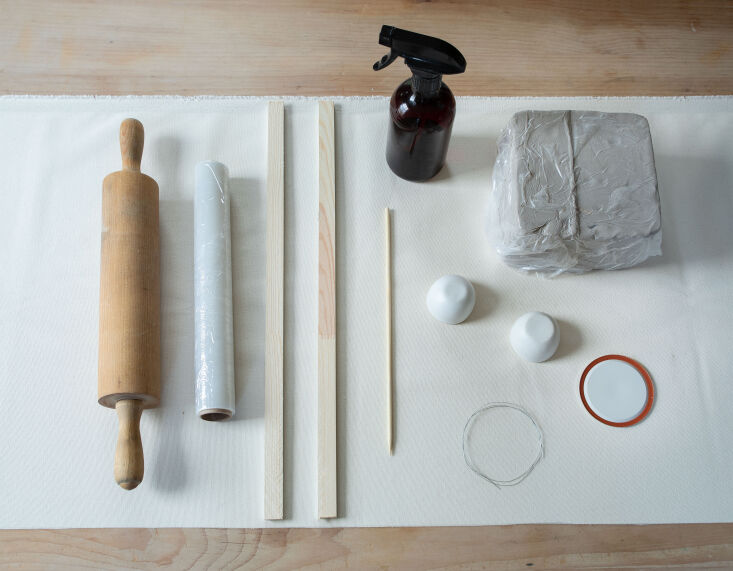
Essential Supplies: The 'No-Pottery-Studio' Toolkit
The beauty of this project lies in its simplicity. You don't need a dedicated studio or specialized tools. In fact, most of what you need is likely sitting in your pantry or junk drawer. When choosing your clay, I recommend a high-quality white air-dry clay for a modern, Scandinavian feel, or terracotta for a more rustic, Mediterranean vibe.
To ensure your votives look professional rather than "elementary school art project," we need to focus on uniformity. Professional potters use "guides" to keep clay thickness even. At home, you can use two thin notebooks of the same height or even two stacks of large popsicle sticks.
| Item | Purpose | Household Substitute |
|---|---|---|
| Air-Dry Clay | The base material | DAS or Amaco brands work well |
| Rolling Pin | Flattening the clay | A smooth wine bottle or PVC pipe |
| Thickness Guides | Ensuring even 1/8-inch thickness | Two identical thin books or magazines |
| Molds | Shaping the vessel | Small jelly jars, spice tins, or ramekins |
| Cutting Tool | Trimming the clay | A butter knife or a clean needle tool |
| Surface | Preventing sticking | A piece of parchment paper or a silicone mat |
Step-by-Step: Crafting Your Votive Holders
Before you begin, clear a flat workspace. I always recommend working on parchment paper; it makes cleanup a breeze and ensures your clay won't bond to your dining table.
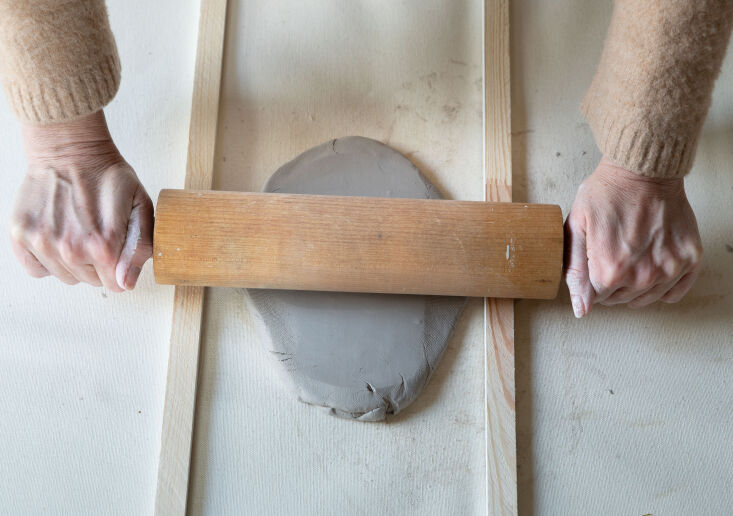
Step 1: Preparing the Clay Start by cutting a wedge of clay from the block. Knead it gently for a minute to remove any air bubbles. If the clay feels a bit stiff, you can dampen your hands slightly, but be careful—too much water will make the clay slimy and prone to cracking later.
Step 2: Rolling and Cutting Place your clay between your thickness guides. Using your rolling pin, flatten the clay until the pin is resting on the guides. This ensures a consistent 1/8-inch thickness across the entire piece. Once flattened, use a circular object (like a wide-mouth jar lid) to cut out the base of your votive. Then, cut a long rectangle that matches the circumference of your base plus a small overlap.
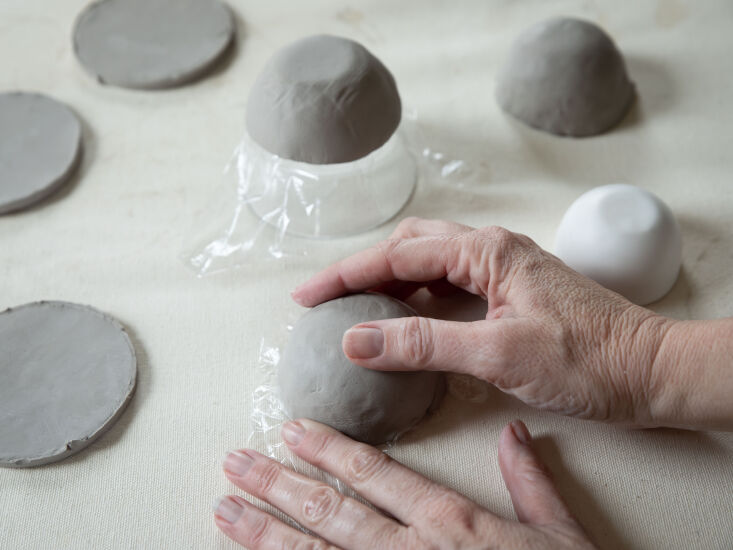
Step 3: Shaping the Vessel To make DIY ceramic votive holders without a kiln, use air-dry clay and shape it over a household mold like a small bowl, jar, or even a citrus fruit for a more organic shape. I prefer using a glass jar because the smooth surface is easy to work against. Wrap the rectangle around the jar to create the "walls," and gently press the bottom edge onto your circular base.
Step 4: The Removal Process The biggest challenge with molds is the clay sticking as it dries. To prevent this, wrap your mold loosely in plastic wrap before applying the clay. This acts as a release agent, allowing you to slide the mold out once the clay has gained enough structure to hold its shape. Use a damp finger to smooth the seams where the clay ends meet.
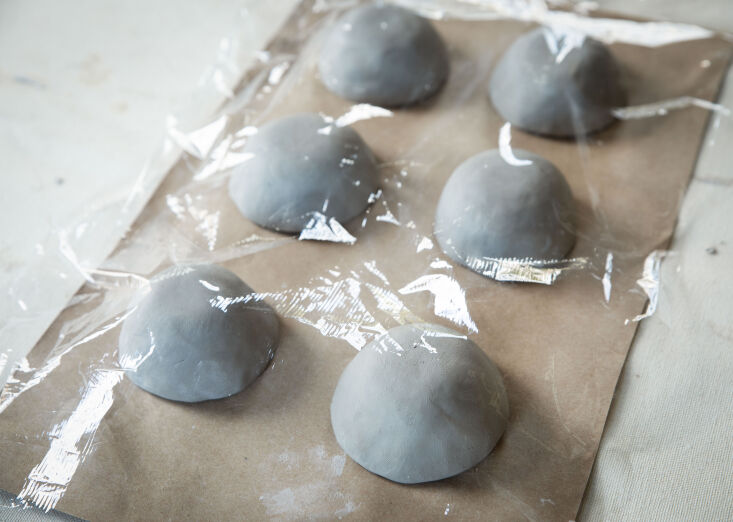
The Science of Drying: Preventing Cracks and Shrinkage
This is where many beginners get frustrated, but with a little bit of science, you can ensure a perfect finish. Air-dry clay typically experiences a 5% to 10% shrinkage rate during the 48-hour drying period. This is why it is essential to choose molds that provide a loose fit for your intended candle size—if the clay shrinks around a rigid mold, it will pull against itself and crack.
Pro Tip: The Slow Dry Rule The number one cause of cracking is uneven drying. If the outside dries faster than the inside, the tension will cause "check cracks." Prevent air-dry clay from cracking by covering it loosely with plastic wrap to slow the drying process for the first 24 hours. This encourages the moisture to leave the clay at a uniform rate.
Always avoid the temptation to speed up the process with a hairdryer or by placing the pieces near a radiator. Patience is your best friend here. Let them cure for at least 48 hours in a cool, dry place.
Finishing Touches: Sanding, Sealing, and Waterproofing
Once your votives are bone-dry and hard to the touch, they might still look a bit "raw." To achieve that professional ceramic finish, use a fine-grit sandpaper (around 220 grit) to gently buff away any fingerprints or uneven seams. Be sure to do this over a trash can or outdoors, as it creates a fine dust.
The most important thing to remember is that DIY air-dry clay votives are naturally porous. They will absorb moisture from the air or any wax spills, which can weaken the structure over time. To make them water-resistant and more durable for long-term use, apply a clear polyurethane varnish or an acrylic sealer. You can choose a matte finish to maintain that earthy, stone-like look, or a high-gloss glaze if you want them to mimic kiln-fired porcelain.
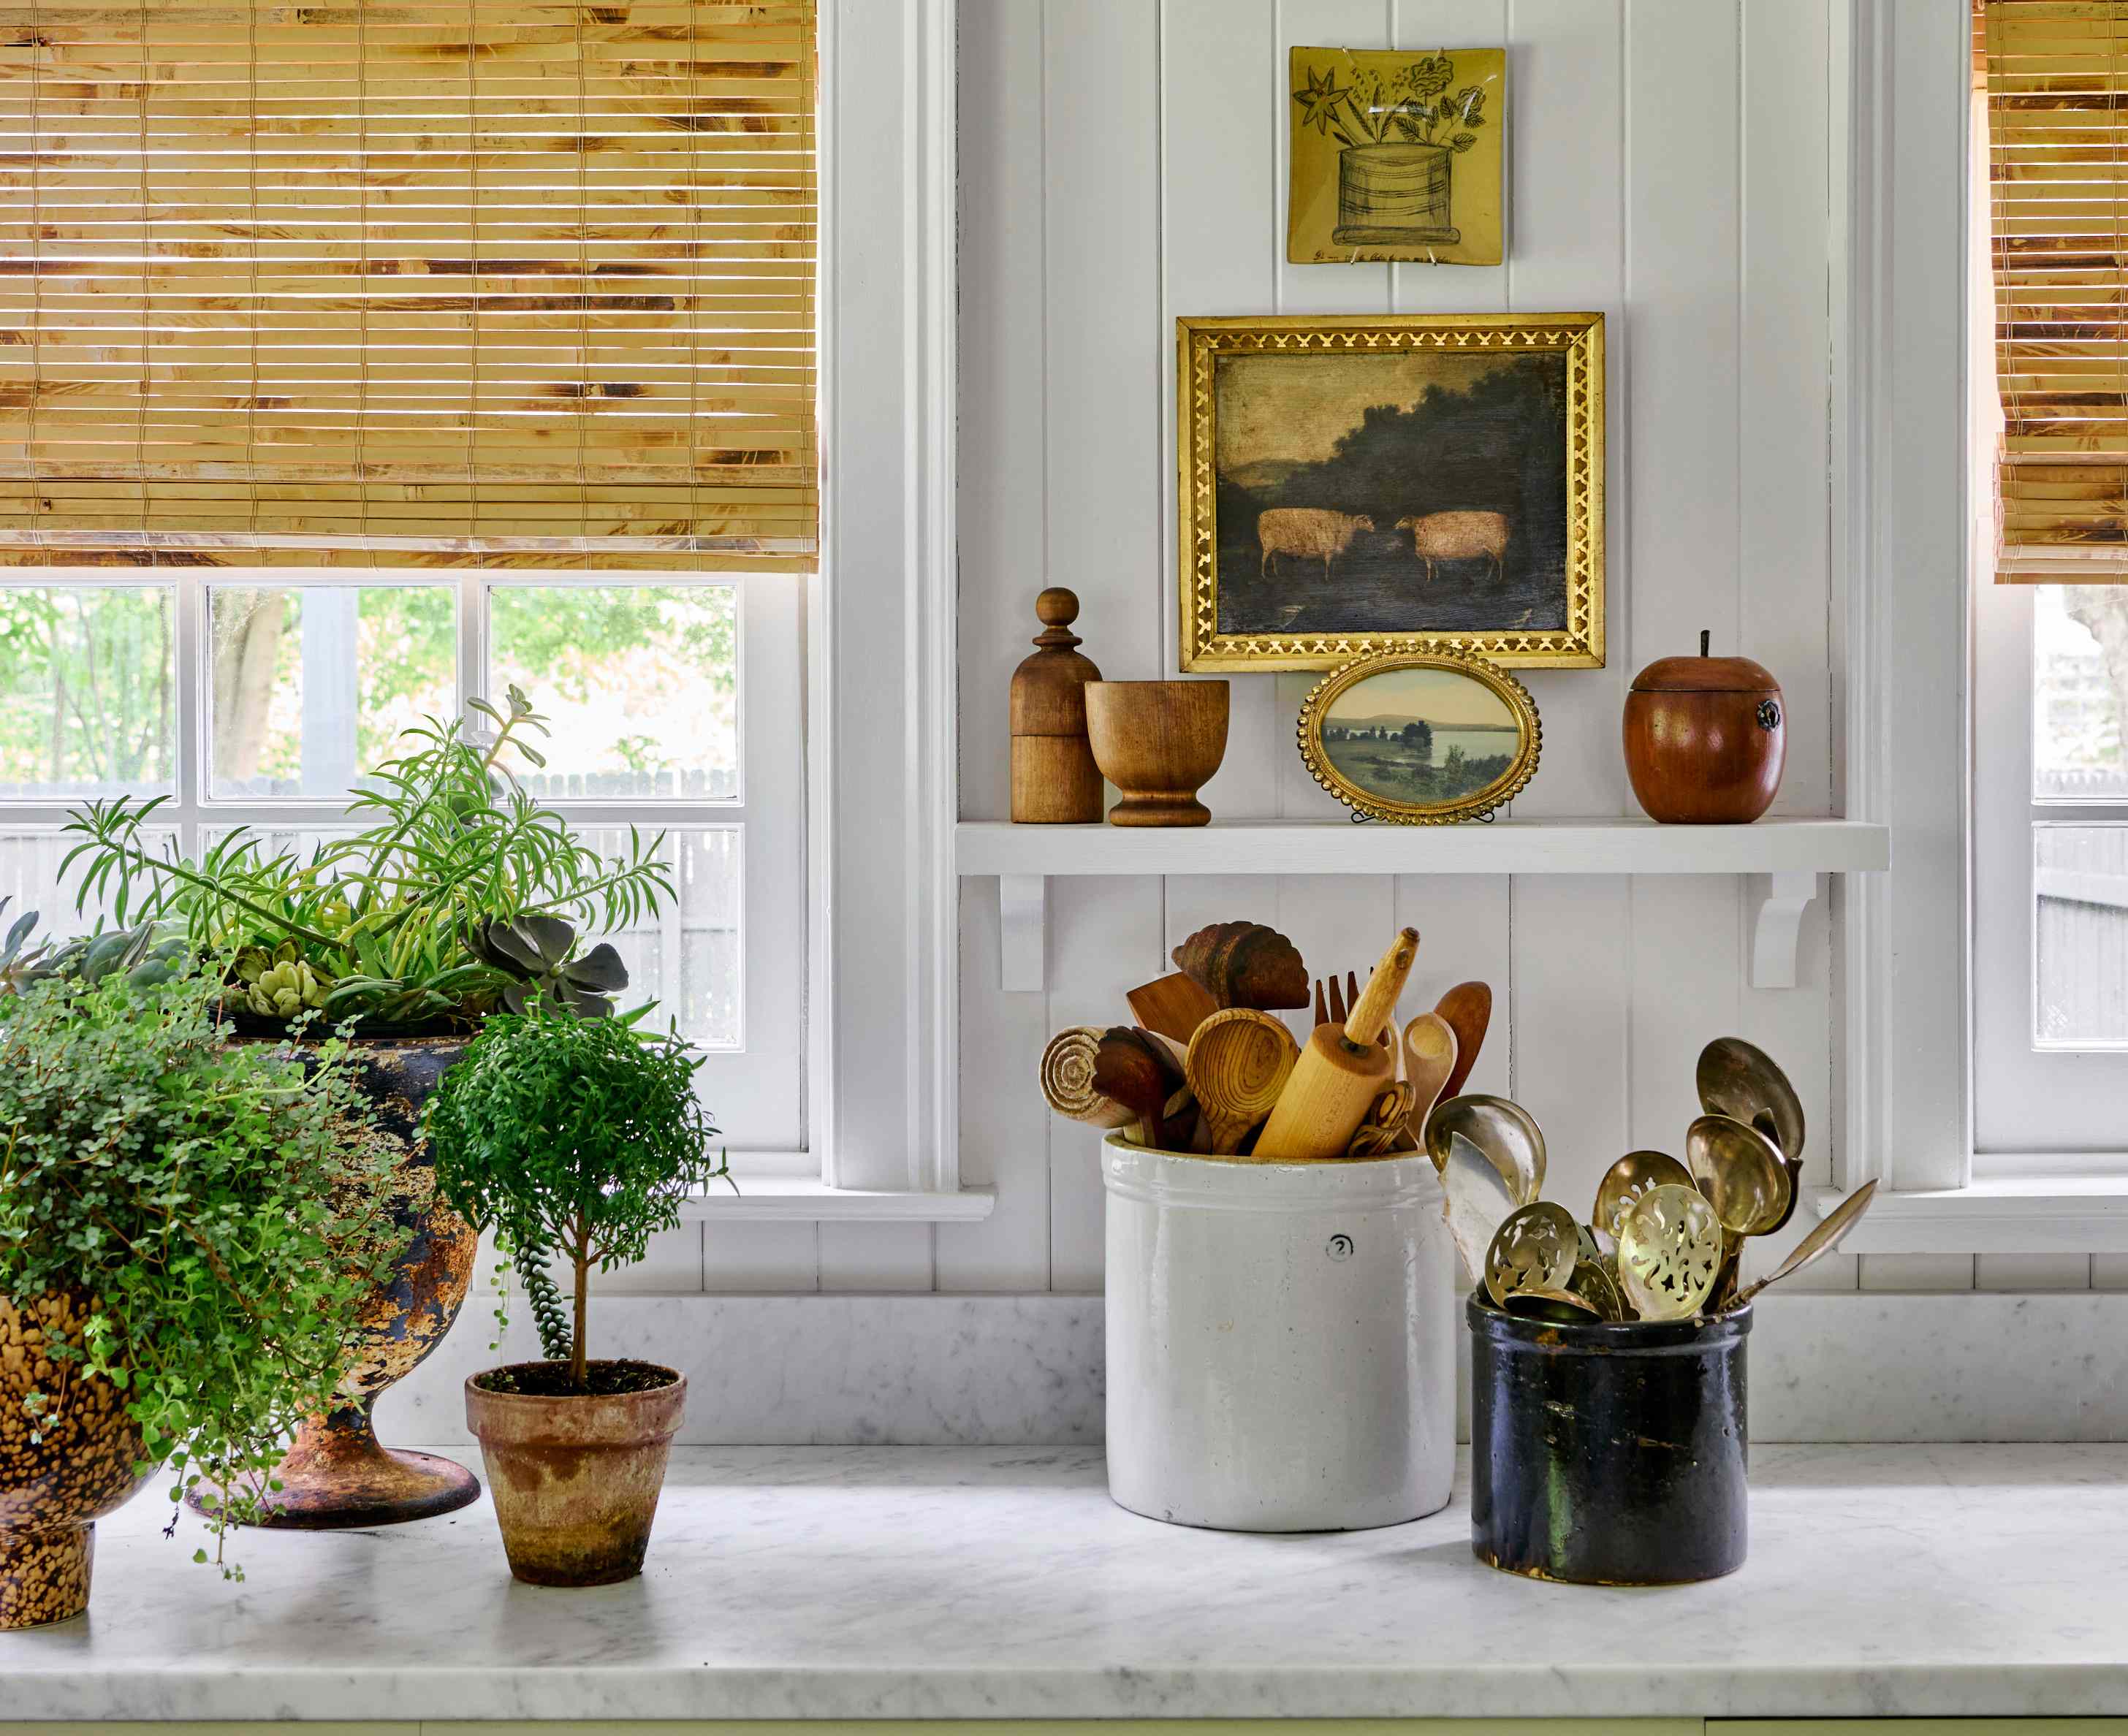
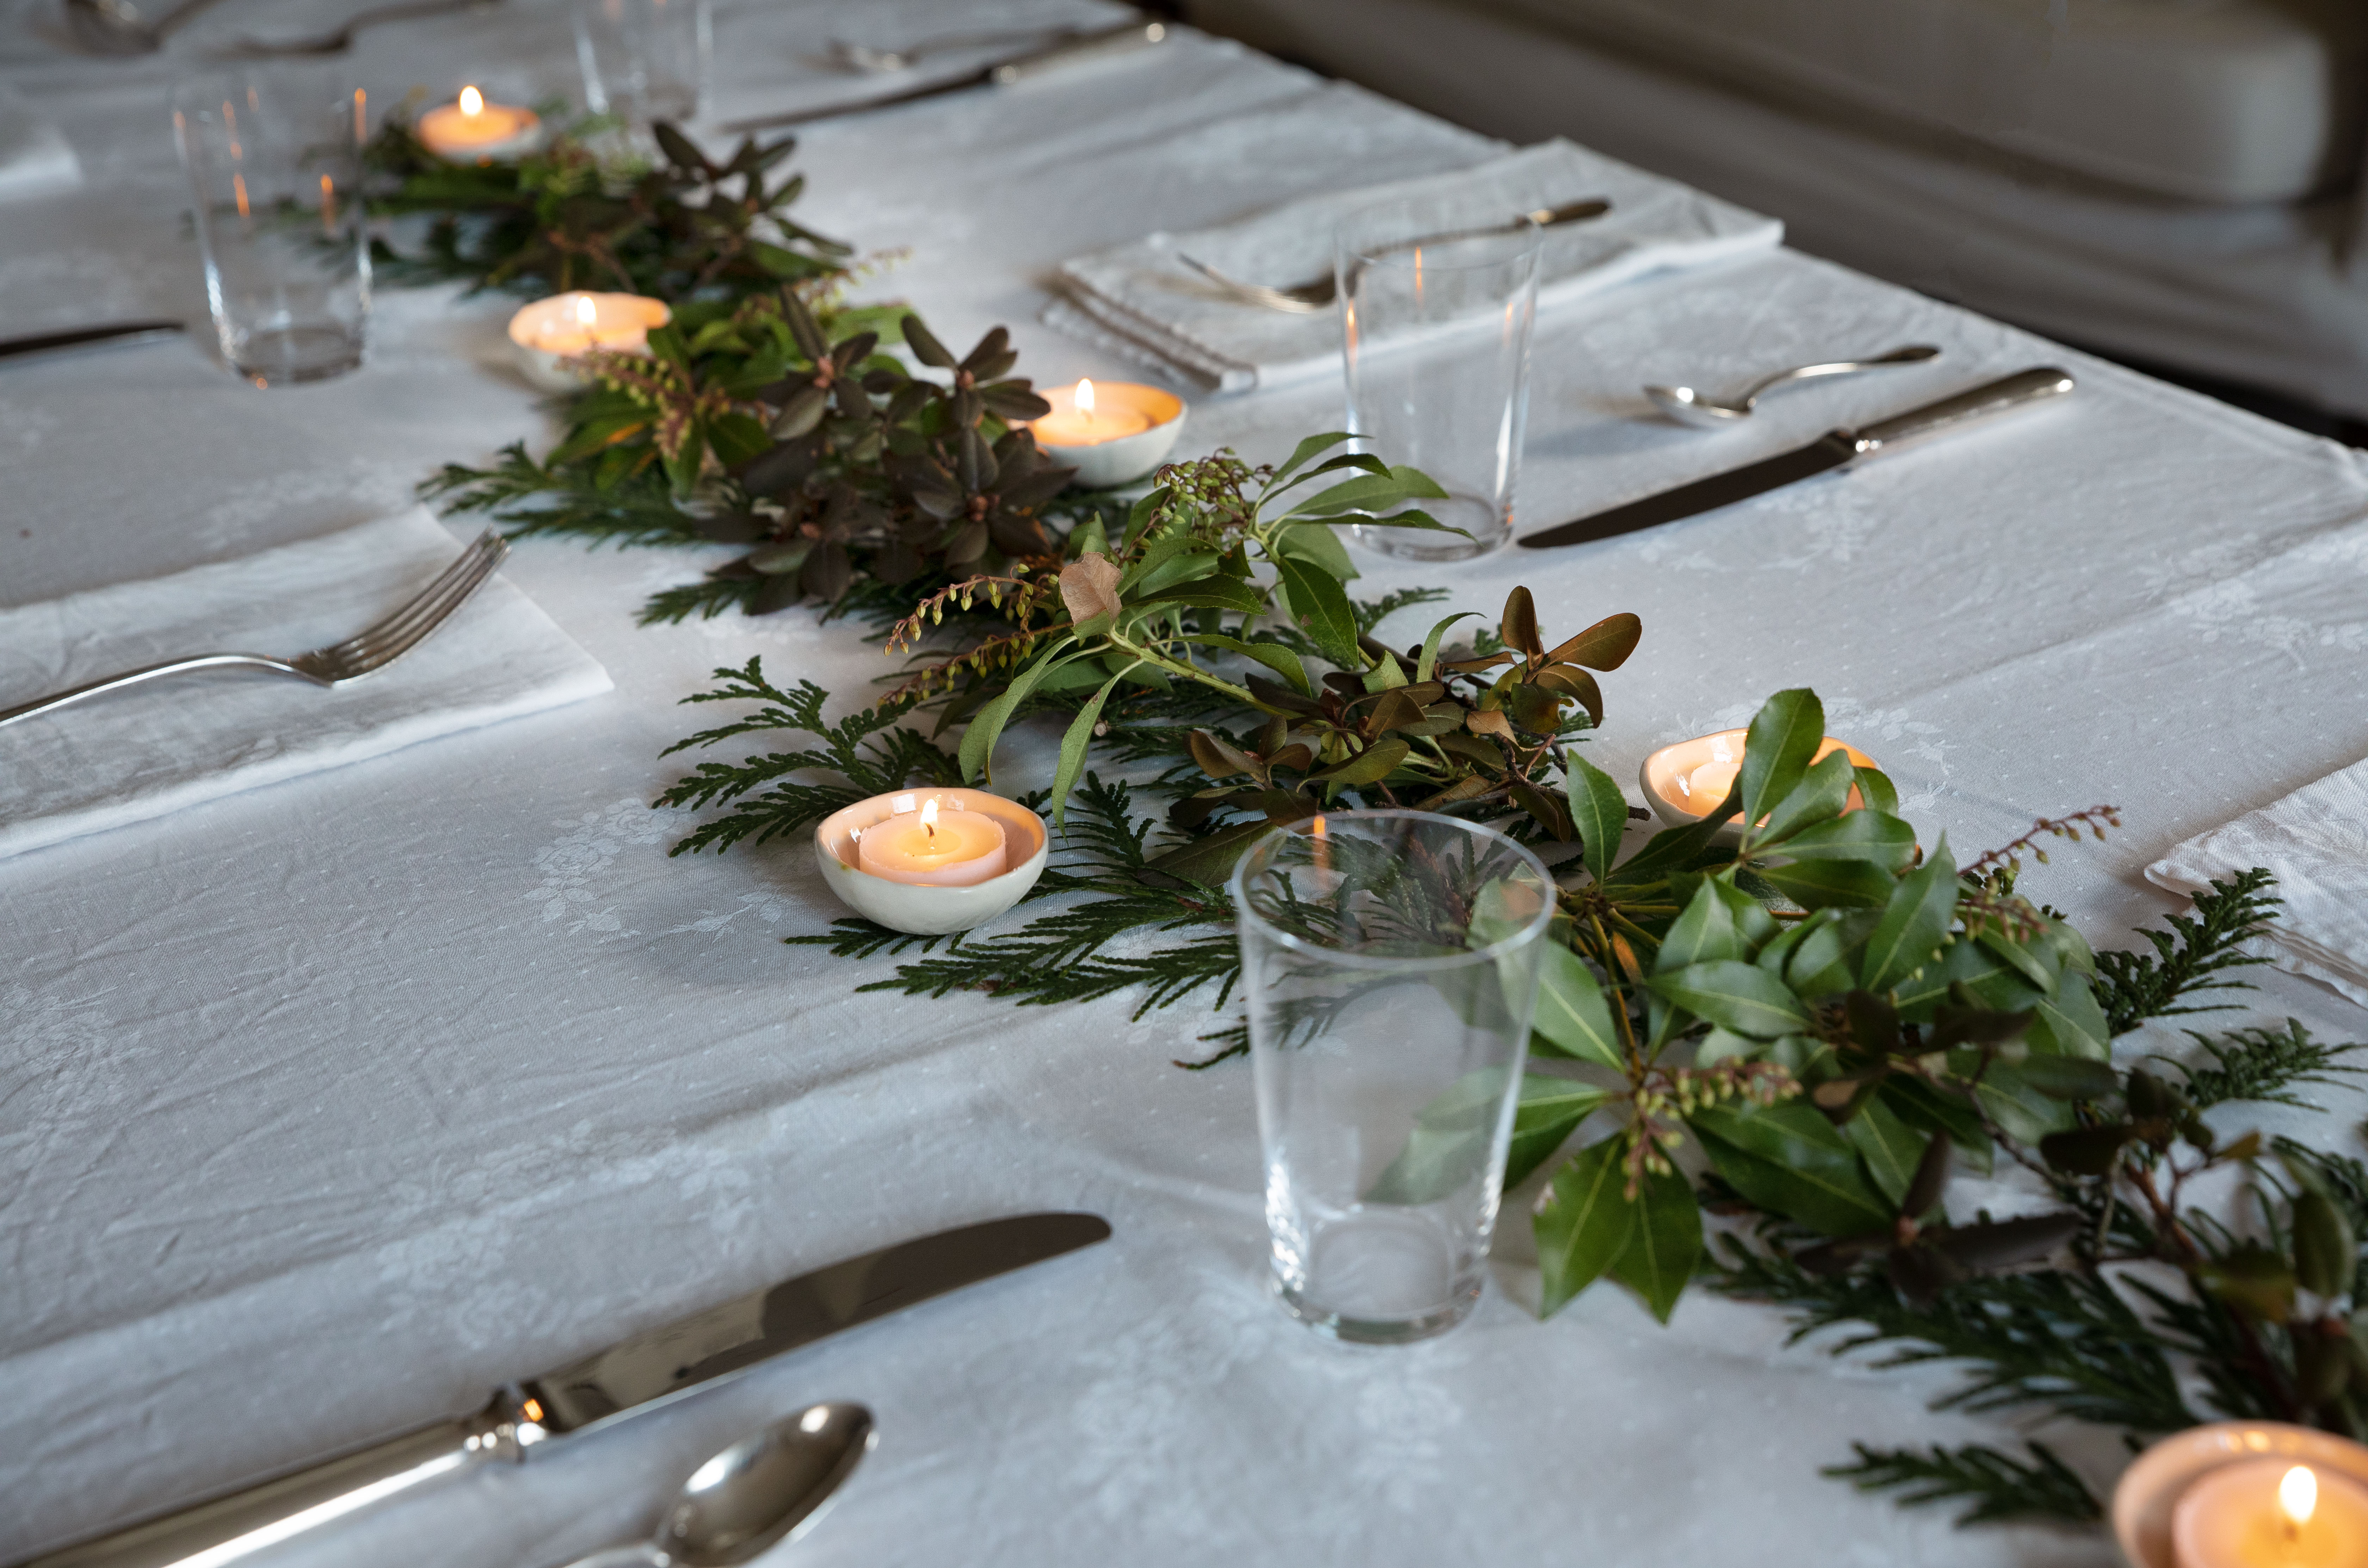
Styling Your Table Setting
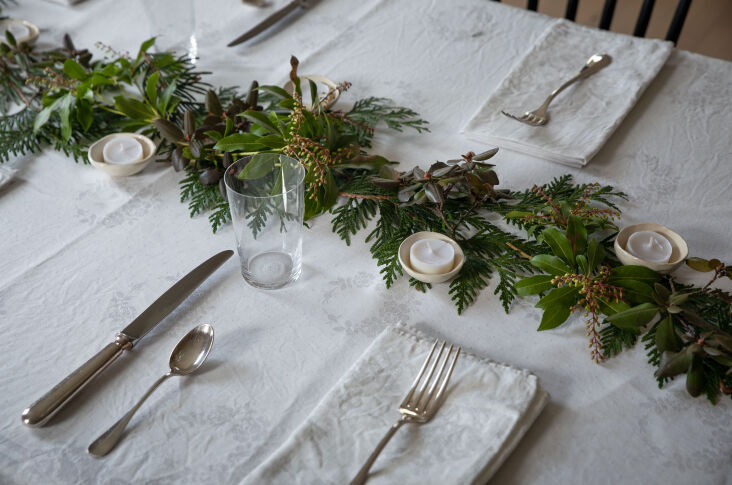
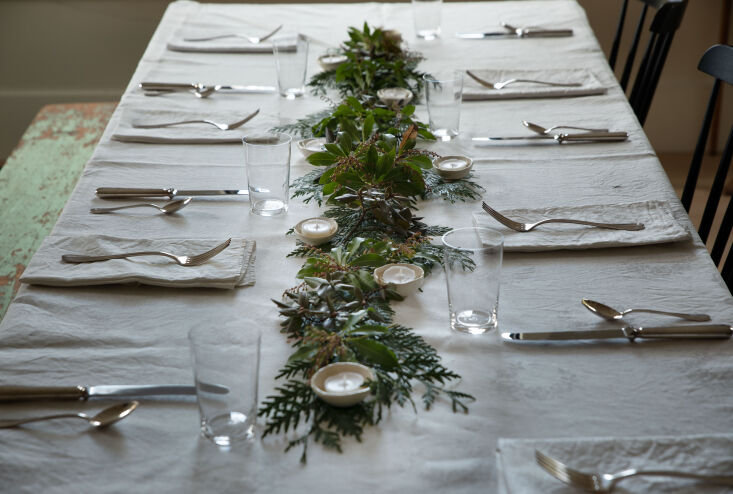
Now comes the fun part: bringing your creation to the table. These votive holders are incredibly versatile. For a minimalist look, group three of varying heights in the center of the table on a linen runner. If you’re hosting a festive dinner, try combining your ceramic votives with foraged evergreens, dried eucalyptus, or seasonal berries.
Safety is paramount when working with DIY materials. While air-dry clay is generally heat-resistant once sealed, it is not "fireproof" in the same way kiln-fired stoneware is. I always recommend using LED tea lights. Modern LED candles offer a realistic flicker without the risk of an open flame near the clay or your table linens. If you must use real wax, ensure the votive holder is wide enough so the flame never touches the sides, and never leave them unattended.
FAQ
Can I bake air-dry clay in a kitchen oven to speed up the process? Generally, no. Most air-dry clays are designed to evaporate moisture at room temperature. Baking them can cause them to bubble, warp, or even release unpleasant fumes. Stick to the 48-hour air-drying rule for the best results.
How do I fix a crack if it already formed? If you spot a small crack during the drying process, don't panic! You can create a "slurry" by mixing a small bit of clay with a few drops of water until it reaches a paste-like consistency. Fill the crack with the slurry, smooth it out, and let it dry again. Once sanded and sealed, the repair will be nearly invisible.
Is air-dry clay food safe? No. Even when sealed, air-dry clay is not considered food-safe. It should only be used for decorative purposes, like these votive holders, jewelry dishes, or wall hangings. Never use them to serve food or drink.
Conclusion
Creating your own table decor is about more than just saving money—it's about the satisfaction of looking at your finished table and knowing that you built that beauty with your own hands. Whether you're preparing for a holiday feast or just want to elevate your Tuesday night dinner, these DIY ceramic votive holders are the perfect place to start.
Gather your supplies, embrace the occasional fingerprint, and remember that the most beautiful homes are the ones that reflect the heart and creativity of the people living in them. Happy crafting!