Quick Facts
- Primary Target: Softwood rake boards and gaps where aluminum flashing seams meet the wood.
- Identification: Search for perfectly round 1/2-inch holes accompanied by yellowish frass accumulation on the siding below.
- Structural Risk: While bees drill tunnels, the most significant damage often comes from woodpeckers attempting to reach larvae within the galleries.
- Best Sealant: Use 1/2-inch wooden dowels or corks paired with exterior-grade caulk; avoid expanding foam products.
- Optimal Timing: Late summer or early fall is the best time of year to seal carpenter bee holes to ensure the bees are not trapped inside during an active cycle.
- Prevention Strategy: Effective carpenter bee prevention in roof gables requires sealing the gaps between metal flashing and wood rake boards while maintaining a finished, painted exterior surface.
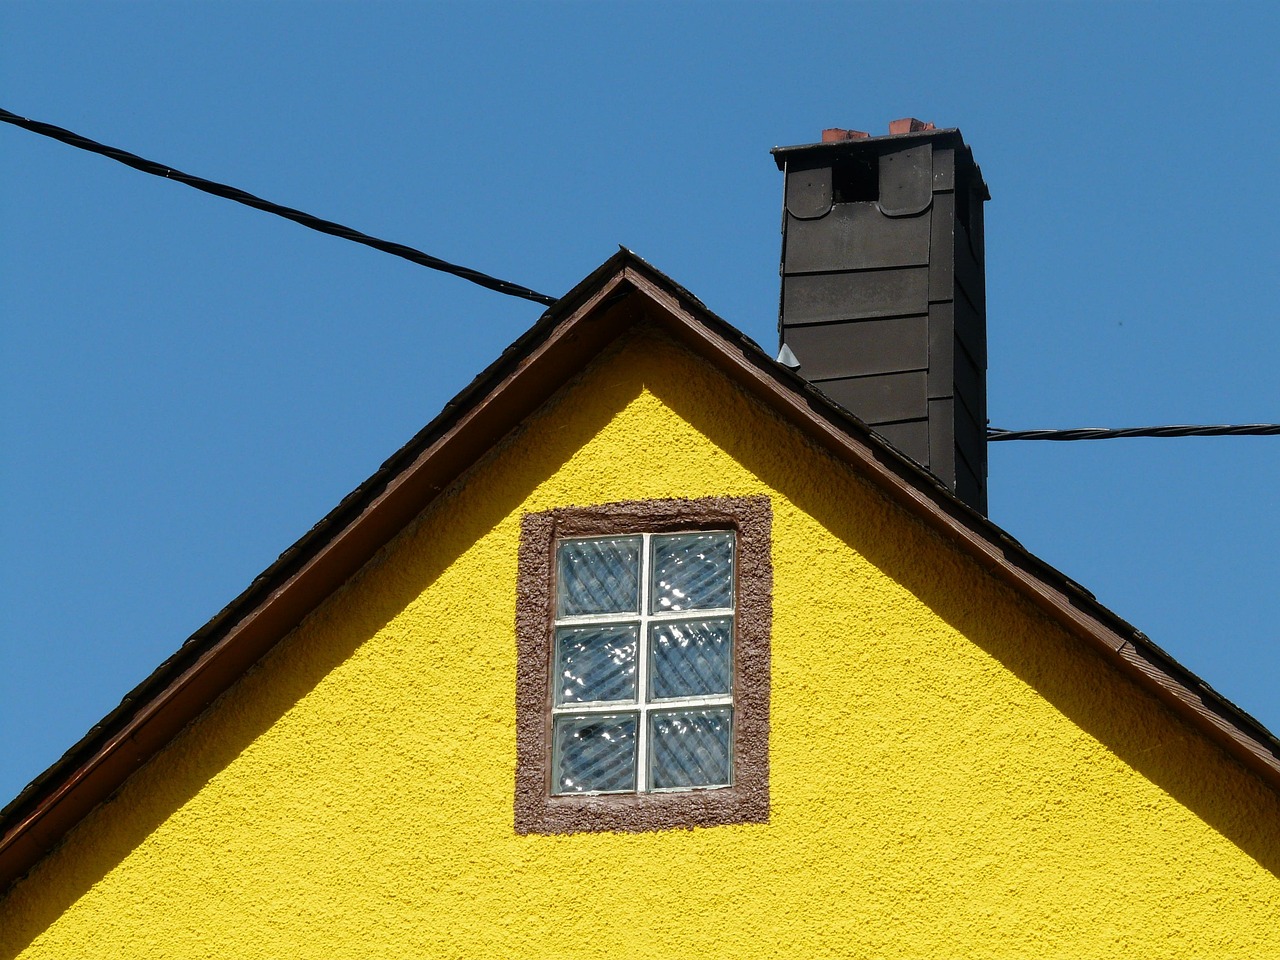
Roof gables and rake boards are primary targets for wood-boring pests due to their height and exposure to the elements. Effective carpenter bee prevention requires a strategic 3-phase approach: treat active tunnels, seal existing holes, and protect surfaces with high-gloss finishes to deter these insects from returning.
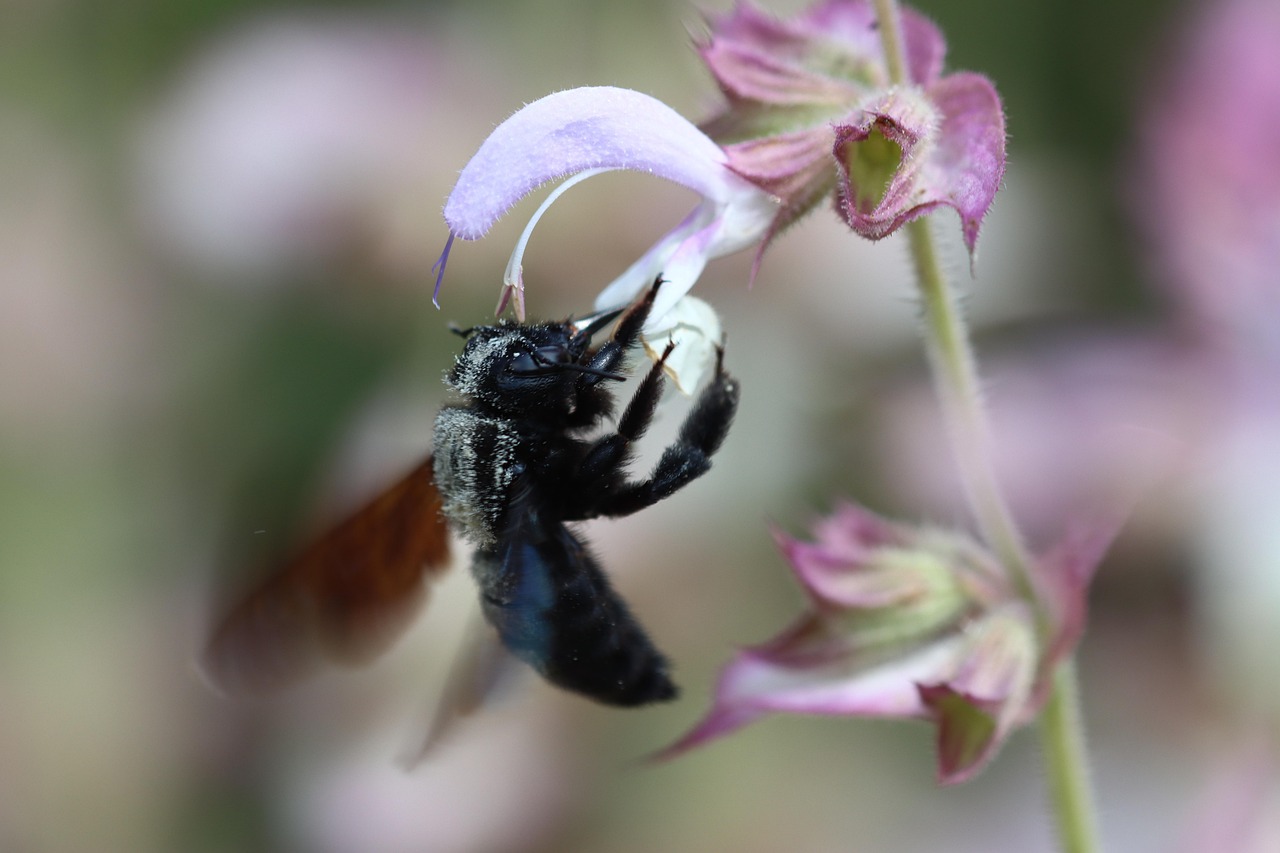
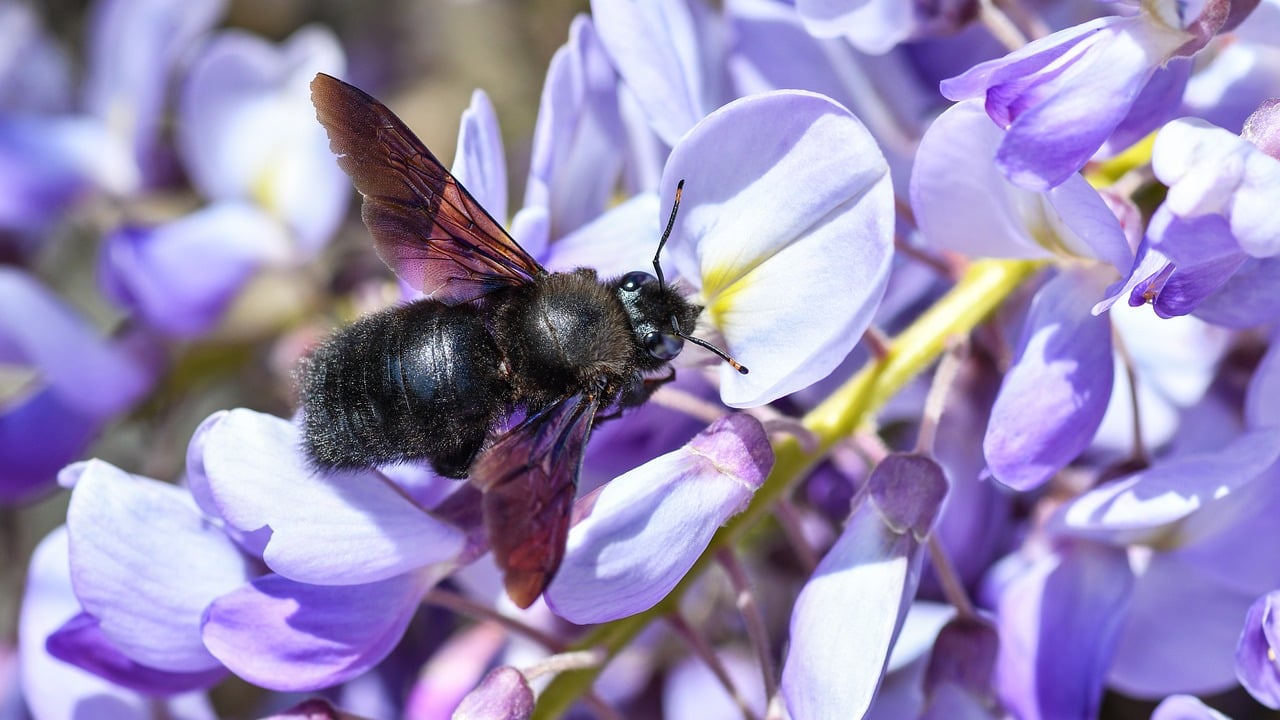
For many homeowners, the sight of large, hovering bees around the roofline is a frustrating sign of spring. Unlike honeybees or bumblebees, carpenter bees are solitary wood-boring insects that see your home’s structural timber as a nursery. If left unmanaged, these persistent pests can compromise the aesthetic and structural integrity of your roof gables, eventually inviting secondary damage from opportunistic predators.
Identifying Vulnerabilities: The Roof Gable Gap
The first step in any successful carpenter bee prevention plan is understanding how these insects select their nesting sites. Carpenter bees are highly attracted to weathered or untreated softwoods, such as cedar, redwood, or pressure-treated pine that has begun to age. On a typical home, the most vulnerable areas are the fascia and rake boards. Specifically, the tiny voids where aluminum flashing seams meet the timber provide the perfect starting point for their excavations.
Female carpenter bees drill perfectly round entry holes approximately 1/2 inch in diameter, which are frequently located on the undersides of eaves, fascia boards, and roof gables. These entry points are usually easy to spot because of the frass accumulation—a mixture of sawdust and bee excrement—that coats the siding or ground directly below the hole.
Beyond the initial hole, the damage is more extensive than it looks. These carpenter bee excavations typically begin with an initial entry depth of 1/2 to 1 inch across the wood grain before making a 90-degree turn to follow the grain for several additional inches. This internal network is what we call a gallery. If you ignore these holes, you also invite woodpeckers. These birds will aggressively hammer away at your roof gables to reach the bee larvae hiding inside, turning a small hole into a jagged, expensive-to-repair crater.

Phase 1: Treating Active Galleries Before Sealing
One of the most common mistakes DIYers make is sealing up carpenter bee holes while the bees are still active inside. This creates a "sealing trap." If a bee is locked within the gallery, it won't just die; it will use its powerful mandibles to chew a brand-new exit path through your structural wood, often causing more damage than the original entry hole.
Before you reach for the caulk, you must ensure the galleries are clear. This process should ideally begin in the early spring as bees emerge, or in the late summer before the next generation settles in for the winter. Start by using a flexible wire to break through any internal pollen plugs that may be blocking the tunnel sections.
Once the path is clear, apply residual insecticides such as Cypermethrin or Deltamethrin. To reach deep into the wood where the bees hibernate, use a bellow duster to apply insecticidal dusts into the overwintering galleries. Unlike liquid sprays that may only coat the surface, dust can travel deep into the 90-degree turns of the tunnel. This carpenter bee prevention treatment ensures that any bees currently inside—as well as those that might attempt to enter later—come into contact with the agent. Let the holes remain open for at least 48 to 72 hours to ensure all activity has ceased.
Phase 2: Sealing and Repairing Structural Holes
Once the bee activity has stopped, it is time for mechanical exclusion. This is the core of roof gable pest exclusion. You aren't just filling a hole; you are restoring the structural integrity of the wood and removing the pheromone-laden scents that attract new nesting pairs in future seasons.
While a new tunnel might only be a few inches deep, reused nesting galleries can reach up to 10 feet in length as successive generations expand the internal structure over several years. Therefore, your repair must be robust.
Material Warning: Avoid Expanding Foam Many homeowners are tempted to use expanding spray foam because it is quick. However, in my experience, foam is a poor choice for roof gables. It is porous, which can trap moisture against the wood grain and lead to rot. Furthermore, it lacks the hardness to deter a persistent bee from simply chewing through it again.
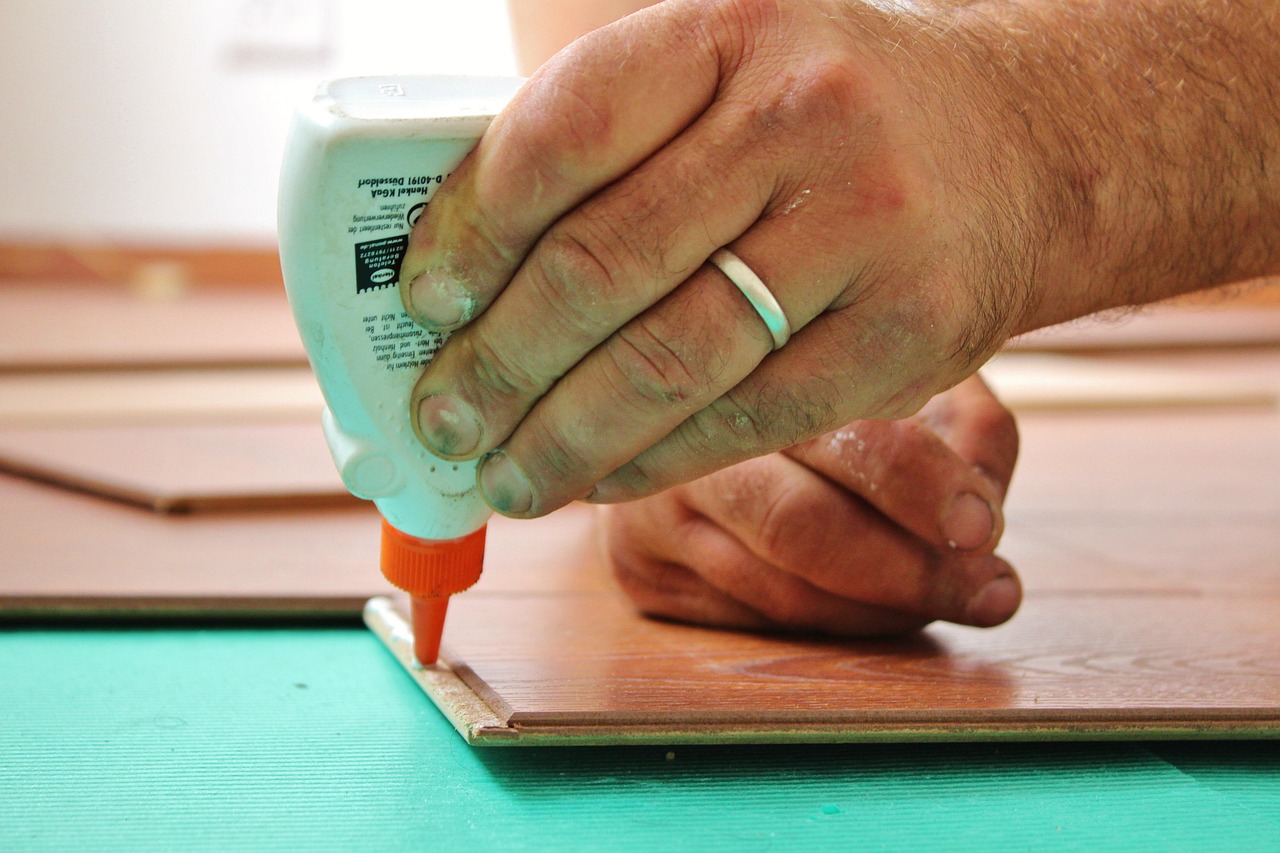
Instead, the gold standard for sealing carpenter bee holes involves a combination of mechanical plugs and high-quality sealants.
- Clear the hole of any debris or remaining dust after the insecticide treatment.
- Insert a 1/2-inch wooden dowel or a specialized carpenter bee plug into the hole. Coat the dowel in wood glue before insertion to create a permanent bond.
- If the hole is irregularly shaped, use the best wood filler for carpenter bee holes—typically a two-part wood epoxy or an exterior-grade wood putty—to flush the surface with the surrounding board.
- For the long-term protection of roof gables, use exterior-grade caulk to seal the gaps between the wood and the aluminum flashing. These seams are the "entry highways" for pests, and closing them is a critical step in preventing carpenter bee reinfestation.
Phase 3: Long-term Maintenance and Surface Protection
The final and perhaps most important step is changing the physical appeal of the wood. Carpenter bees are looking for the texture of raw, weathered wood. By creating a physical barrier with a high-quality finish, you make the wood much harder for them to drill into.
Painting wood to prevent carpenter bees is significantly more effective than applying a transparent stain. A solid film of exterior paint or a thick, solid-color stain creates a hard surface that masks the scent of the softwood substrates. For the best results, apply a high-quality primer followed by two coats of exterior paint on all fascia and rake boards.
In addition to paint, consider the installation of physical barriers. If your roof gables have consistent issues, inspecting and reinforcing the aluminum flashing seams can provide a secondary layer of defense. You can also use fine stainless steel mesh tucked behind the gaps in the eaves to prevent the bees from finding a foothold.
Remember that carpenter bee prevention is a seasonal cycle. Even with the best repairs, you should do a walk-around every early spring during the seasonal emergence of the bees. Look for new holes or areas where the paint has chipped, and address them immediately before a new nesting cycle can begin.

FAQ
What keeps carpenter bees away?
The most effective deterrent is a combination of hard surface finishes and mechanical blockades. Maintaining a fresh coat of exterior paint on softwoods like cedar and pine is a primary defense. Additionally, sealing any structural gaps with exterior-grade caulk or installing aluminum wrap over fascia boards can physically prevent bees from accessing the wood grain.
Can you permanently get rid of carpenter bees?
While it is difficult to completely eliminate them from your entire neighborhood, you can permanently protect your home. This involves a consistent maintenance schedule that includes preventing carpenter bee reinfestation in old tunnels by plugging them with dowels and maintaining a thick paint barrier. If the bees cannot find accessible raw wood, they will likely move to a different nesting site.
What month do carpenter bees go away?
Carpenter bee activity usually peaks in the spring (April through June) during the mating and nesting season. They do not truly "go away" until late autumn when they enter their overwintering galleries to hibernate. Late summer and early fall are actually the best time of year to seal carpenter bee holes because the new adults have developed but have not yet entered deep hibernation.
What does WD-40 do to carpenter bees?
Some DIYers use WD-40 as a quick fix to spray into holes because it acts as a mild solvent and repellent. While it may kill bees on contact or temporarily stop them from entering a hole, it is not a long-term solution. It is volatile and evaporates quickly, leaving the wood vulnerable again. It is much better to use residual insecticides and permanent wooden plugs for a lasting repair.